Thursday, April 28, 2011

Photographic Tour Though the Enchanted Gardens

Photobucket


On Earth day, which was also Good Friday, the boys both had off school. I decided that it would be a perfect day to go to Powell Gardens to see the Enchanted Gardens and view all the fairy houses that had been made for the exhibit. I was pleasantly surprised to find out that the fee into Powell Gardens was free because of earth day.

My oldest is really into his camera (a hand-me-down gift from a sweet cousin) so I wanted to use this opportunity at the garden for him to snag some great pictures of all the fairy gardens. So enjoy my son’s photographic tour throughout the enchanted gardens…

Photobucket


Photobucket


Photobucket


Photobucket


Photobucket

Tuesday, April 26, 2011

Gnome Homes For Rent


The other day we checked out the book “Gnomes” by Rein Poortvliet and Wil Nuygen. It is all you could ever want to know about gnomes. One area we focused our studies on was how a gnome build his home. He starts building the home 15-20 years before he is married. He looks for where moss is growing and for a secret entrance. We have a ton of trees in our back yard and the boys and I talked about how cool it would be for us to have a whole gnome city in our backyard.

My oldest thought we should make some doors for all the places we thought would be nice gnome homes so maybe a wandering gnome might find our yard appealing.


So we spent a day gathering stuff to make our doors with. Sticks, rocks, nut shells, leaves, etc… We painted some of the sticks to add some color.
We also made some decorations using some clay you bake in the oven. We made some door knobs, windows, hinges, etc. This took a few days for us because we just kept getting distracted with some other things we needed to do.
I had my husband cut up some thin plywood into rectangles that I had painted with a cream colored paint. Once that was done with glue stick in hand we were ready to decorate.
These are a few we came up with.


Friday, April 15, 2011

Why Do I Garden?

Cantoloupes


Gone are the days when we are expected to garden for our survival. As I grew up, I always remember my grandparents gardening. They were some of the last of their era. They gardened because that is what they knew and what they did to feed their family. Even then the paradigm was shifting. My grandfather would work days at a grocery store and because of convenience and cost he began to bring things home from the store more and more. As the years went on their garden slowly got smaller and smaller. They still garden today, not because they have to, but because it is what they know. There is something beautiful and simple about that.


It may seem I am romanticizing gardening but that is not it at all. A gardener works hard and long hours in their garden to be able to enjoy the fruits of their harvest. The two best parts about gardening are knowing where/how/what went into your food (from seed to mouth), and the knowing of my history.


Photobucket


I remember as a young child helping my grandparents and parents in their quarter of an acre garden. Flashbacks to my youth were filled with memories of long hot summer days in my grandparent’s garden, summer canning, the snapping of beans and shelling black eyed peas. There is nothing that can bring a group together better than working a garden together and at the end of the day coming together for a meal that together you grew.


I think you can grow more by listening to those that have “grown” before you. I am not that little kid helping out in the garden but my grandparents and I share a common interest in gardening. Though these conversation with them I am gaining glances into our history. For example, last year when I started growing melons, I learned that my great granddaddy was a watermelon grower and he could grow some of the best watermelons in their community. They told me how he would save the biggest and best for collecting seeds from for the next year.


This was a story I had never heard before and probably would not have heard about had we did not share a common interest in gardening. I may not garden with my grandparents still, but they are still passing on our history of gardening to me, which I hope to be passing down to my grandkids one day. Happy growing!

My Forays into Gardening

Photobucket


Over the years I dabbled in gardening (read planted a lot of stuff and watched it die or not thrive). Then I had kids of my own, and initially I was more focused on buying organically and locally grown produce for health reasons. I first joined a CSA, but really had a hard time with it because I did not know what veggies I could expect to be picking up on my pick-up day. Working outside the home 40 hours a week I use the weekends to plan the next week’s meals and also I do some initial food prep for the week. So getting unknown items in the middle of the week was really throwing off our schedule. It made it hard not to waste some of the great veggies I was getting. The nice thing about the CSA was I was supporting the local farmers and my family was eating better and fresher produce. In the end it was the cost that got me, I just could not justify the cost with what we were wasting weekly. So we did not sign up for another year.


I was still concerned about feeding my family organically and locally but finding organic produce in my local grocery store was next to impossible. 5 years later there are more organic choices but still you are very limited and most options are not from local sources. The great thing about the CSA was it delivered foods to me that I would not have tried from my grocery store. So the new found explorer in me was disappointed and needed another way to satisfy my sense of adventure. We then shifted our produce shopping to the local farmers markets. At first find an organic farmer was hard, but doable. Over the years this has changed, I have found more and more farmers at the markets that are growing their food “organically”. I use the quotes because sometimes you ask a farmer if their produce is organically grown, some have started to pause, break eye contact and then say, “well yes it is”… This left me feeling less than confident that what I was feeding my family, was what I wanted them to eat.


My Plot


That is when I started experimenting in growing my own stuff, but as I stated earlier I was not that successful. My first year I had just gotten a new puppy that was very destructive, so I decided to do some container gardening in my front yard. That was sadly the year of the groundhog… We would almost have a ripe veggie to eat only to find it missing the next day. It was so frustrating. That winter I started researching different gardening methods and in the spring we chose the perfect spot for our small raised bed garden. The spot seemed perfect except for one thing… when the leaves grew in on the surrounding trees our garden was mostly shaded 50% of the day. I called in my dad to consult on cutting down a few trees in the backyard for the garden but was quickly vetoed (by my dad and Dh). Needless to say that although some stuff grew that year we were not harvesting the bounty I had dreamed about.


Squash Plot


Then the answer to what I had been looking for came two winters ago I saw a email for a community garden, which was being hosted by someone I had met when pregnant with my second. I went to the initial meeting not sure what to expect, and came away with dreams of fabulous dinners created with all the foods grown by us. I knew we had many months of hard work ahead of us. The garden was 6000 square feet, it had been gardened organically on for 6 years but the year prior it was not gardened. It needed some improvements, new fencing, trenches dug for row ways, mulch laid, a new gate made, composting bins, watering system figured out… Oh and of course planting and gardening. ;)


Garden


We got a late start on all of this, starting the month of May. It was June before many of us got anything planted in the ground. It was one of the hardest working spring/summers I have ever had and our list of to do items did not get completely done, but all and all was a year of many successes. I grew things I never would have thought about doing, we ate more produce we grew that what we bought, I learned things from the group I never would have learned on my own, my kids had experiences that will be with them for a lifetime, and our family made friends and found a community that share a common interest and goal and it was fabulous.


Photobucket


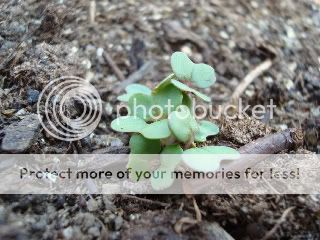
As we enter our second year of the garden, our family is excited and eager to garden with the group again. We already have stuff growing in the garden! This is earliest I have ever gotten anything in the ground. The enthusiasm of the group has a way of motivating you and getting you excited, especially when gardening may be the last thing you would want to do. I am really looking forward to enjoying the garden and the community this year again, but I won’t lie, I hope this year is a little easier.

Sunflower Houses

Photobucket

Ever heard of sunflower houses? Well neither did I until last year. We checked out the “Sunflower House”, by Eve Bunting at the library and after reading it we decided it was a must for the community garden. Each plot at the community garden is 20’x10’ so we decided to make two rooms four our house. We planted clover for the “carpet” and then all different kinds of sunflowers for our walls.

Photobucket


The reason we chose clover as our “carpet was because clover is a great cover crop. It is grown to help suppress weeds, prevent erosion and build healthier soil. Cover crops also add valuable organic matter and nutrients to the soil and are sometimes called "green manures". Clover also provides bees with good sources of pollen and nectar. We all want bees in the garden to pollinate and make a healthier garden.


Photobucket

There were a few details that we will change the next year we do it but all and all the sunflower house was a fun project for my kids and I. We should have let the clover grow and get established before we planted the sunflowers, it never came in nice and thick, but a year later it is a lush carpet of clover. ;) Also we had two furry friends that liked to visit the garden. (A baby raccoon and ground hog) They both liked to pull the sunflower branches down and eat our walls. Finally since we did not make real thick wall in the house the sunflowers seemed to fall over with the wind.

Photobucket

These are however me as an adult looking at the things I would change for next year. For the kids the sunflower house was a great escape, the perfect peak-a-boo spot, great place to watch without being watched and a wonderful spot for pictures. Sadly we won’t be doing it again this year at the garden, but I want to do another one at home so the boys can have a sunflower “fort” for the summer.

Photobucket

Everything but the Kitchen Sink Brown Sugar Scrub

AWWWWW… That is what you say when you watch as your favorite brown sugar facial scrub goes down the drain, thanks you your 6 year old who just wanted to “use a little…” I am not typically one of those girly types but this scrub is to die for, in my opinion, and it is probably one of the few “girly” things I have in my bathroom. I love it, and apparently so did my son. Bless him he felt so bad, and then my husband wanted to see what the big deal was so he tried a little drop that was left on the counter and he claimed “this stuff is pretty awesome…” Great state the obvious, make us feel even worse. ;) Later that night I awoke and had a thought that in that moment was simply brilliant (if I do say so myself). Who says everything in your kitchen HAS to be for consumption? We have brown sugar in the refrigerator, why can’t I make some of this myself? At least something that will do until I can buy my little slice of heaven again. So the next day over lunch I found myself making Brown sugar body scrub instead of my typical pb&j. If you want some too here is what you need to do. Everything but the Kitchen Sink Brown Sugar Scrub

  • 1 cup organic brown sugar

  • 1/3 cup organic white sugar

  • 2-3 tablespoons of organic coconut oil (melted)

  • ¼ cup of local honey
Mix the above together with your hand mixer and put in an old mason jar. To use: wet hands add a scoop of mixture and scrub away. Verdict is it works great and the best thing is I had all the ingredients in my own pantry. So it was very inexpensive and I know exactly what went into it. I do think I will have to put this mixture in a jar with a wider mouth though, to make it easier for my hand to scoop it out. The boys have already requested their own jar and I caught DH showering in my shower so he could use my good stuff. It looks like I will be making some more real soon.

Homemade Deodorant

Photobucket

For personal and health reasons I choose to not use deodorant that contains aluminum. I have gone though a ton of the ones that you can buy in the store and have just never been pleased with the results. So a few years ago I decided to try to try homemade deodorant. I started using coconut oil for its antimicrobial, antioxidant, antifungal, and antibacterial qualities and because it has a nice scent. But it was missing the keep me dry feeling. So I ordered some deodorant from and etsy friend and I it is perfect!! The last batch she made me is sweet orange and I absolutely love it. Though I love the orange smell and the uplifting qualities of orange essential oils, citrus oils can make an individual photo-sensitive. I am already fair skinned, so I usually burn fairly easily. I do not need to add anything that will make it worse. So I need to find a new scent that I love just as much as the orange and I can then order a summer batch of deodorant in that scent. Since everyone body chemistry works differently with essential oils I thought it would be best to try a few different essential oil blends on myself before I order. Therefore making a few small batches of easy homemade deodorant to add my mixtures to was necessary. I took:

  • 2-3 tablespoons of coconut oil

  • 1 tablespoons baking soda

  • 1 tablespoon corn starch or arrow root

  • 3-5 drops of your favorite essential oil


Mix the above all together. At this point you could divide this into two bowls, so you can experiment with different essential oil blends. For my essential oil blend I used 3 drops Lemongrass, 1/2 drop of peppermint, and 1 drop of frankincense. If I had tea tree oil I would have added it instead.

Photobucket

I have been saving a small empty travel size deodorant for just such an occasion as this. I scooped the mixture up and into container. Half of this mixture fits in the smaller travel size.

Photobucket

What I love about this is you can make small batches and try out different oil blends. The absolute best thing about this is that I know everything that went in my deodorant and I cook with it on an almost daily basis. :) Be warned though, coconut oil melting point is 72 degrees so you may have to put your deodorant in the fridge if you have a hot house or live in a hot area.

Fairy Butter


This month the boys and I are learning about all things fairies. Since we all like to cook together, I thought it would be fun to google what kinds of recipes we could find on fairies and make a project out of it. Many of the recipes I found contained all kinds of processed items but I did stumble across a recipe for fairy butter. The original recipe can be found here.

The original recipe sounds delish but I did not have any orange flower water and I was a little unclear on some of the directions so I improvised. ;) I just mixed together:
  • 2 yokes of hard boiled eggs (mashed to a fine powder)
  • 1 tablespoon of water (took 1/4 cup of water and added a drop of sweet orange essential oil)
  • 2 tablespoons of powder sugar
  • Added about 5 tablespoons of your favorite butter (we did shatto) or churn your own
Spread on some fresh homemade bread. We use a 5 minute artisan bread recipe found here.

Final product was a great sweet early morning snack served under a tree observing our fairy gardens for movement. Of course we had to leave some for them too. ;)

Oh You Nutty Monkey Smoothie


We are a hockey family with two boys and a husband that turn just about every second of free time into a hockey match either on the ice or off. Both DH and my oldest son sometimes complain of their stomachs not feeling good after some intense exercise. To help with this DH doctor told him he needed plenty of fluids and to eat some potassium after he exercised. So when my son started complaining of the same thing after his hockey practices, I decided to find something they both will eat and enjoy.


I came up with the Oh You Nutty Monkey Smoothie it is chocked full of all kinds of great things to help you rebound after a hard game or workout. Add a banana for the potassium. 1 cup Hazelnut milk because hazelnuts are an excellent source of vitamin E, dietary fiber, magnesium, heart healthy B vitamins, and they are one of the highest natural sources of antioxidants. Of course some peanut butter because of the protein. Did you know our bodies use amino acids found in protein to build and repair muscle tissue? As if this drink is not healthy enough, lets add some Chia seeds. Yes I said chia seeds, they are not just for use on your favorite chia pet. Chia seeds are not only high in omega-fatty 3’s but also have antioxidants, fiber, protein and calcium. Another interesting fact about the chia seed is that they were an ancient super food used by the Mayans, Aztecs and Incas. In fact, Chia means "strength" in the language of the Mayans, and was considered running food because messengers could run all day with the help of these tiny seeds. For more information on chia check out this wiki. Oh You Nutty Monkey Smoothie


  • 1 banana

  • 1 cup chocolate hazelnut milk

  • 1 tablespoon all natural peanut butter

  • 1 tablespoon chia seed

  • 2 handfuls of ice cubes

Mix all of the above for some yummy goodness. Enjoy!

Homemade Pizzas with Whole Wheat Honey Crust

Photobucket


I am not sure about you, but I think every night should be a pizza night. We love pizza at our house, but we all have our own likes and dislikes. For Example DS#1 does not like red sauce, DS#2 likes and dislikes change like the weather, I love veggie pizzas and DH likes everything on his pizzas. So how can you satisfy everyone so someone is not left unhappy? Have a make your own pizza night of course!


I have always wanted to try to make my own pizza dough but have always thought it to be too difficult. Then one day I was inspired (well kind of). I wanted pizza for dinner and we did not have a crust or pre-bought dough at home and the thought of dragging to boys to the store at 5:00 was not appealing in the least. Therefore I decided to make a challenge for myself to make my own dough. I looked at a few recipes and compared them. Basically you have flour, yeast, water and you can add some sweetener and oil if you choose. So this is the recipe I came up with.


Photobucket


Honey Whole Wheat Pizza Crust


  • 1 ½ cup warm water

  • 1 packet of yeast

  • 1 tablespoon of olive oil

  • 2 tablespoons of honey

  • 1 teaspoon of Sea Salt

  • 1 ¾ cup Organic Whole wheat flour

  • 1 ¾ cup Organic Unbleached White flour

Mix warm water and yeast packet together and let it bloom (about 10 min). (Hint if using packet of instant yeast you might not get a nice bloom). While that is doing its thing, mix the salt, and both flours together in a bowl. Make a reservoir in your flour. After 10 mins is up add oil and honey to water mixture, stir and pour into reservoir. Fold in flour from sides into reservoir until ball is formed. Knead the dough, place in bowl and cover with wet towel or plastic wrap. Let sit for 1-3 hours, then spilt dough into 4 balls, and cover and let sit for 30 mins. (Note: A warm place is a good idea for the bowls.) Spread out dough and add toppings. Cook in oven for 10 min.


Photobucket


Note: I used a pizza stone in my oven, so I set my oven to highest setting and let it preheat longer than normal (the stone takes longer to warm than the oven does). Sprinkled cornmeal on stone and then placed pizza on top. Cook for 10 min. Oh what yummy crunchy goodness. I have never been able to make my store bought dough come out where a slice did not droop, so my expectations in that area were low. This pizza crust had no drooping and was crispy throughout.


One con was it seemed that this dough was pretty dense around the edges. I will be experimenting with different flours and raising processed over the next few months. Or just coming up with a few dipping sauces to serve on the side. ;)

Toppings at our house last night included:

  1. Olive oil, turkey pepperoni, olives and mozzarella

  2. Olive Oil, Roasted mushrooms, onions, garlic cloves with havarti cheese

  3. Butter, pears, walnuts, blue cheese with a balsamic reduction drizzled over the top when finished

SFG (AKA Square Foot Gardening)

My Plot

As I began my forays into gardening a few years ago I researched and chose to go with a gardening method called Square Foot Gardening. Square foot Gardening was founded by Mel Bartholomew. The key difference in SFG and raised bed gardening is the use of “Mel’s Mix” as apposed to dirt…. Mel’s Mix consists of a blend of vermiculite, peat moss, and compost. This blend is created to maintain and retain moisture while providing optimal nutrients to plants. SFG is great if you have a small space or are an urban gardener such as myself.

My Plot

What I love about SFG is the division of your beds into a grid system with each individual grid supporting a single type of plant. For some reason this appeals to my need to have a place for everything. Also it makes it real easy to weed a space because you know where everything should be. And the added plus is you can grow a greater variety of items within a smaller space. The utilization of growing vertically as well as horizontally allows for such beautiful and versatile garden. So when I joined the community garden I was totally overwhelmed with the prospect of actually growing in the “dirt”. LOL so of course I created my own little square foot garden in my plot. But the beauty of the community garden was that I could grow what I wanted in my own plot and experiment with growing the traditional way in some of the community plots. It was a great learning experience to grow some of the same veggies using the different methods.

Sweet potatoes and corn

My first planting in the real dirt was to plant sweet potatoes. I had research and researched how to grow sweet potatoes in a SFG but I think because sweet potatoes need depth to grow you would need to grow your sweet potatoes in a high rise. I did not have the time, space or money to make high rises for 24 sweet potato plants, but I did have some great nutrient rich dirt to grow it in. Oh my, if you never have had the chance to grow sweet potatoes you really should try it this year. We had such a great yield in the fall and really it was the healthiest and easiest plant to grow the whole year. I am still eating sweet potatoes grown in the garden last year.

eggplant

I also did a side by side comparison of tomatoes, eggplants, watermelons, cantaloupes, and variety of squash. Overall I think the plants liked growing in the dirt (they grew faster) but the plants in the Square foot garden did not have weeds, disease or pests as much (or they were the last to fall to these issues). I believe that my plants in the Mel’s mix would have done much better if I had watered my plot more regularly. I fell into the trap that I did not need to water as much because of the Mel’s mix.

Cantoloupes trellised

When growing the cantaloupe and watermelons, I trellised the melons in my SF plot and did the traditional mound planting for the community plot. As I stated above the melons planted in the dirt grew much faster. I think melons preferred to be trellised it not only kept them healthier but they also produced more fruits. My plants did eventually develop the powdery mildew but it was months after the other plot was gone due to the same thing.

Melon patch

An added bonus of the SFG is the versatility of my plot. When having to rotate my crops I have many different options available to me. For example lets look at my tomatoes. I can either plant them in a different box than I did last year or I can chose to empty a box and just plant them in the ground. I choose to do the latter this year. I took out two boxes and moved the Mel’s Mix into my other boxes picked them up dug up the dirt added com compost and the ground is ready for me to plant my tomatoes, eggplant and peppers in this year. Who know what I will do with them next year, the options are almost endless… ;)

Our plot

I love Square foot gardening, it is just SO easy, but I am also learning to love growing in real dirt… it is just taking me a while to fall “in love” ;)

Fairy Gardens

Photobucket

After studying many books about all the different types of fairies what they like and how to welcome them, we decided to make some fairy gardens. Both boys had a blast and it was a really fun project that continued to span over the next few days. The gardens themselves only took a few hours. We picked bright and fragrant flowers for the potted gardens. Picking lots of Alyssum for how fragrant it is and Snapdragons because we all just love how pretty they are. I am sure any fairy would be attracted to them.

Photobucket


Photobucket

We made one pot have a bathtub because the water changes properties if fairies take a bath in there. This put even had a clothes line in back for the fairies to hang their towels to dry.

Photobucket

Another we added a bed and chair for the fairies to rest and relax. Bed has a simple felt blanket and pillow. Take note of the entry way in back welcoming the wandering faire.

Photobucket

Another had a swing for the fairies to swing on, because what is more fun that swinging on a swing? We planted chocolate mint in this one, because frankly I can think of nothing I would rather do than swing while smelling chocolate and mint… Like a slice of heaven.

Photobucket


Photobucket


Photobucket

Our last one was in our biggest pot and really we ran out of flowers so it left a lot of space for my oldest to create the perfect haven for fairies. He added lots of little foot bath areas, a garden, chair with a seashell lamp, a swing, and even an easel for the artistic fairy (we are still on the search for the perfect set of paint brushes). The arched entry way is sure to welcome many a fairies; I only hope this oasis is not so perfect they fight over who can live there.

Photobucket


Photobucket


Photobucket

As I said before this project lasted many days, I keep seeing the boys walking by the pots and checking to see if anything has been disturbed. My littlest decided to add a seashell bowl full of “grapes” (from a Grape Hyacinth) for them to eat. I have been directed to leave out some almond milk and fruit for the fairies to dine upon. My oldest decided to make a gnome that is there to greet new fairies. And lastly we had to make some mushrooms for the garden, because well of course that is what fairies would grow in their gardens. ;)

Photobucket


Currently Powel Gardens has an Enchanted Garden exhibit that has lots of fairy houses on display. We plan on making a trip down to the garden to check it out. Check back here to hear how our trip went. Powell Gardens


Photobucket